Installing CFX GraFx packages
- Installing CFX GraFx packages

INSTALLING GRAFX PACKAGES
You can install the GraFx packages from this website using the steps described here. These steps are generic guidlines for installation and are to be used a reference.
Once you’ve completed your order from the library you will receive an email with a link to download the package.
Should you have any troubles installing these packages please contact me in the crystalfocus.net Facebook group and I will try to help!
Go to the GraFx library
Once you’ve completed your order from the library you will receive an email with a link to download the package.
Should you have any troubles installing these packages please contact me in the crystalfocus.net Facebook group and I will try to help!
Go to the GraFx library
Step 1: Download and open the package
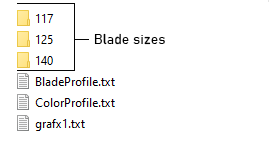
- The ‘Blade sizes’ folders contain the GraFx bitmap files. Use the blade size that is closest (or just bigger) than the number of pixels in your blade. (ledstrip= setting in config.txt)
- BladeProfile.txt contains the blade profile you need to apply. (The blade profile needs to be edited which I'll explain below)
- ColorProfile.txt contains the color profile you need to apply
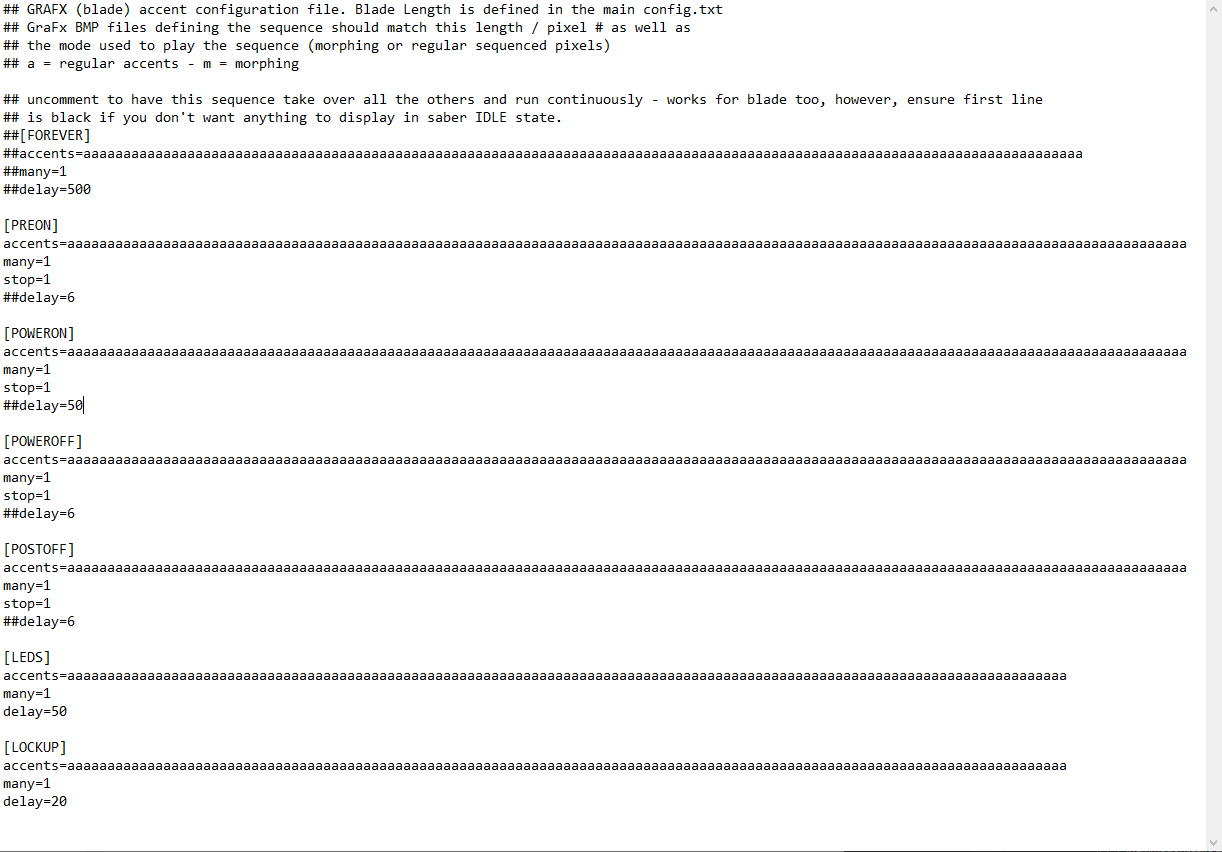
- grafx1.txt contains a suggestion of your GraFx configuration.
You will see the following files and folders:

Step 2: Open and edit the CFX SD-card
Navigate to the 'extra/GRAFX' folder
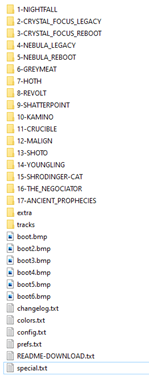
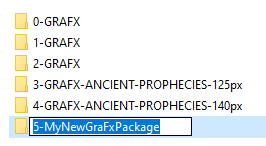
Copy and rename a folder
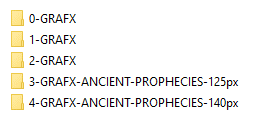
Make sure the index number of the newly created folder is subsequent with the other existing indexes. If the highest numbered folder starts with '4-' then your new folder must start with '5-'
Make sure the index number of the newly created folder is subsequent with the other existing indexes. If the highest numbered folder starts with '4-' then your new folder must start with '5-'
Before
After
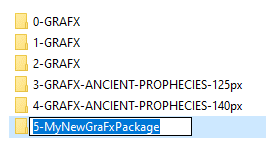

After

Open this new folder and copy all files from the 'blade size' folder of your choosing from the downloaded GraFx package.
Also copy the grafx1.txt file from the downloaded GraFx package into this folder. Use this file in the next step.

Also copy the grafx1.txt file from the downloaded GraFx package into this folder. Use this file in the next step.

Step 3: Open and edit the 'grafx1.txt'
- Comment out all lines of the [FOREVER] stage
- Give all ‘accent=’ lines as many ‘a’-characters as the ledstrip-setting in the config.txt file. Got ‘ledstrip=117’ in the main config? Place 117 ‘a’-characters behind all ‘accents’ lines.
- For most poweron and poweroff effects you can comment out the ‘delay’ lines.
- Add ‘stop=1’ to both [PREON], [POWERON] and [POWEROFF] sections if it’s not there.
Lines that start with ‘##’ (= commented out) will be ignored by the CFX. Some lines are commented out on purpose.

Step 4: Open and edit the font config
Open the font_config.txt file located in the soundfont folder you want to apply this package to and set ‘qon=0’ and ‘qoff=0’.
Commenting out the delay setting in the grafx.txt and using qon=0 and qoff=0 will autosize the GraFx animation to the length of the sound
Also make sure that 'start_blade' and 'start_color' point to the index of the blade profile and color profile that you want to use for this soundfont!
Commenting out the delay setting in the grafx.txt and using qon=0 and qoff=0 will autosize the GraFx animation to the length of the sound
Also make sure that 'start_blade' and 'start_color' point to the index of the blade profile and color profile that you want to use for this soundfont!

Step 5: Open and edit the main config
Open the ‘config.txt’ in the root of your sd-card and replace the entire blade profile you are using with the soundfont with the provided blade profile from the downloaded package.
Most of these parameters should already be setup, but some of them need to be changed in the next steps:
Most of these parameters should already be setup, but some of them need to be changed in the next steps:
- style_grafx: this links the correct GraFx folder to this blade profile
- style_pixies: this links the correct PIXIES folder to this blade profile
- style_preon: when set to 4 the blade profile will use a GraFx preon effect
- style_pon: when set to 10 the blade profile will use a GraFx poweron effect
- style_lockup: when set to 7 the blade profile will use a GraFx lockup effect
- style_poff: when set to 11 the blade profile will use a GraFx poweroff effect
- style_postoff: when set to 4 the blade profile will use a GraFx postoff effect
Important (v10.008C+): Starting from CrystalFocusX-v10.008C you must set
over_pon=4 for the poweron to work correctly.
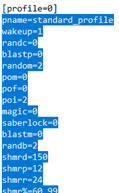
Now you need to change the line starting with ‘style_grafx’ and set it to the index of the folder you created in the ‘extra/GRAFX/’ folder. In this example it’s index 5.
For firmware v10.007F and up you will need to rename 'style_grafx' to 'style_grafx1'
For firmware v10.007F and up you will need to rename 'style_grafx' to 'style_grafx1'
The GraFx folder created earlier
The index number should match this setting


The index number should match this setting

Step 5.1: For Sabertrio Powercore only
Set these parameters in the blade profile for your illuminated button:
style_accents=2
style_pixies=3
style_accents=2
style_pixies=3
Step 6: Open and edit the color config
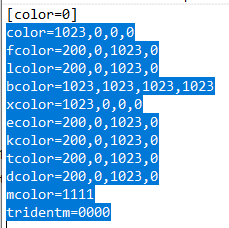
Open the colors.txt in the root of your sd-card and replace the entire color profile with the provided color profile from the downloaded package.
Step 7: Restart the CFX!
Restart the CFX but cutting power or sending the 'Reset' command using Crystal FX or RICE over usb.
Go to the GraFx library
Go to the GraFx library
Copyright crystalfocus.net © 2026 | Privacy policy